🚨 Note: An update to this doorbell has been made integrating Pushover functionality. Read more here.
I have recently purchased a Hikvision DS-KV6113-WPE1(B) doorbell. The doorbell is one of very few PoE doorbells which look good, work well and relatively in expensive. The doorbell also allows the video feed to be viewed over RTSP which integrates well into my DVR system (Shinobi Frigate).
Recently Hikvision have released firmware (Readme / Firmware) which can be installed on the doorbell so it can be used in 'standalone' mode, negating the requirement to use a base (Screen Intercom). Using the device in standalone mode worked fine for my use case as I could install the Hikvision Connect app on my smartphone, the only downside is there was no wall chime could no longer be used.
I looked into how I could 'hook' into the door press events on the device, fortunately most Hikvision devices offer an API via ISAPI. After researching this over a few different forum posts (here, here and here), I found it was possible to check the status of doorbell events via CURL commands, and was able to identify when the doorbell button was pushed. By being able to check when the button was pushed allowed would allow a 'chime' to be triggered.
Setting up the doorbell on your network
I setup the device on my network based on the user manual. I also set a static IP address based on the device's MAC Address via my router. Then changed the admin user's password to something secure and ensured the device was on the latest firmware.
ISAPI CURL Examples
Run these in a terminal on your computer, either MacOS or Linux. It may be possible to run these on Windows as long as you have CURL CLI installed, but I don't really have any experience Windows systems.
Replace YOUR_PASSWORD with your doorbell's admin user's password. And replace YOUR_IP with your Doorbell's IP address.
Get status:
curl -i --digest -u admin:YOUR_PASSWORD http://YOUR_IP/ISAPI/VideoIntercom/callStatus?format=json
Shows either idle, ring or onCall
Hangup a call
curl -i --digest -u admin:YOUR_PASSWORD -d '{"CallSignal":{"cmdType":"hangUp"}}' -H "Content-Type: application/json" -X PUT http://YOUR_IP/ISAPI/VideoIntercom/callSignal?format=json
Next steps with the Raspberry Pi Pico
I now knew ISAPI would provide the necessary status checks for this project. I started to research the best method to create a 'chime' device. I was originally planning to use a standard Raspberry Pi device, likely a RPI 2b as I would not require the extra compute power of the newer devices.
Around this time, the Raspberry Pi Foundation had just released a WiFi enabled version of their Pico microcontroller.
I was nervous in using a Microcontroller as this would be my first time, but I quickly found out the documentation provided was fantastic, and I would be able to use 'Micropython' a slightly cut-down version of regular Python. They had a version recently released for the WiFi Pico model. Micropython meant I would be able to develop my project with Python, I know my code would not require any advance libraries so I began ordering equipment I knew I would require for
this project:
- RPI Pico: WiFi version with Headers pre-soldered headers -- As of March 2023, Kitronic is the only place in the UK I could find which solder the WiFi model with pre-soldered headers.
- Room Sensor Enclosure -- Size 2 (with Pi HAT / 3A+ Mounts) -- Vented (https://thepihut.com/products/room-sensor-enclosure-size-2-with-pi-3a-mounts?variant=39957973008579)
- Premium Female/Female Jumper Wires -- 20 x 3″ (75mm) (https://thepihut.com/products/premium-female-female-jumper-wires-20-x-3-75mm?variant=27739698577)
- Adafruit I2S 3W Class D Amplifier Breakout -- MAX98357A (https://thepihut.com/products/adafruit-i2s-3w-class-d-amplifier-breakout-max98357a?variant=27740275281)
- Stereo Enclosed Speaker Set -- 3W 4 Ohm (https://thepihut.com/products/stereo-enclosed-speaker-set-3w-4-ohm?variant=27739539793)
Creating the Python script I installed Micropython (I used v1.19.1) on the Pico. It was very straight forward based on the documentation provided by the Micropython developers:
- Micropython UF2 Firmware downloads: https://micropython.org/download/rp2-pico/
- Docs: https://docs.micropython.org/en/latest/
Further documentation from the Raspberry Pi Foundation:
- Getting started: https://www.raspberrypi.com/documentation/microcontrollers/micropython.html
- Tech Spec: https://www.raspberrypi.com/documentation/microcontrollers/raspberry-pi-pico.html
Once Micropython was installed I started creating the Python script which would be run on the device.
I have a full demo of the code available on Github here: https://github.com/ryanfitton/rpi-pico-hikvision-isapi-doorbell-chime
You will find the Python code in src/main.py. There were also a few additional libraries required, these are stored in src/libs/, more info about these libraries below:
Additional libraries required. These are found in src/libs/:
- Md5: https://github.com/ryanfitton/rpi-pico-hikvision-isapi-doorbell-chime/blob/master/src/lib/md5.py -- Required to produce MD5 hashes for Digest Authentication.
- uhashlib: https://github.com/ryanfitton/rpi-pico-hikvision-isapi-doorbell-chime/blob/master/src/lib/uhashlib.py -- In the code, but currently not used. The MD5 library is being used instead.
- uping: https://github.com/ryanfitton/rpi-pico-hikvision-isapi-doorbell-chime/blob/master/src/lib/uping.py -- In the code, but currently not used. I intended to Ping the Doorbell device first to ensure it existed on the network however I found this didn't work very well.
These libraries are also used, but are already bundled with Micropython:
- network
- urequests
- uping
- ujson
- urandom
- ure
- ubinascii
- time
- os
- utime
- ntptime
- machine
- gc
Finally the 'chime' sound had to be made. I used the same sound which Amazon's Ring Doorbell cameras used, but converted this into the WAV file format and adjusted the sample rate to 8000Hz and saved the file in 16-Bit PCM. There are a few versions of the WAV file saved in src with differing audio volumes. I found the doorbell-new-loud.wav performed the best.
I copied the code to the Pico via Thonny. The Raspberry Pi Foundation site has a good tutorial on using this software, getting Micropython installed and Python scripts copied to the Pico: https://projects.raspberrypi.org/en/projects/getting-started-with-the-pico/2
If you want to run the code from this project on your Pico. Download the files from Github: https://github.com/ryanfitton/rpi-pico-hikvision-isapi-doorbell-chime and copy all files within src into the root of your Pico Pi. But ensure you add your WiFi and Doorbell details in main.py first.
I learnt Micropython will always first check for a file named main.py on boot. If it exists it will be run first.
How the Python script works
The script works connecting to your WiFi network. The doorbell must be on the same network and accessible by the Pico. Then a looping function starts which acts as a 'doorbell status check'.
- If the status is 'ring' this means the doorbell button has been pressed. The script will play the chime (
doorbell-new-loud.wav), after 3 seconds the same chime will be played again. - Wait 5 seconds
- Check the status. If status is still 'ring', then wait an additional 3 seconds then hang-up the call. Else, do nothing.
This loop will happen continuously, unless the Pico has an error. There is a 'watchdog' which checks if the code has stopped. It will then restart the Pico device in order to get the code running again. I found during testing this 'watchdog' event was required as the device seemed to run out of memory after around 12 hours.
Setting up the hardware
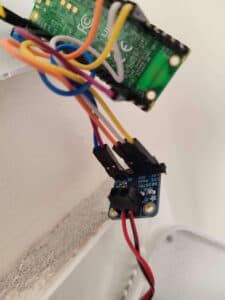
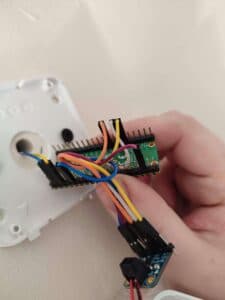
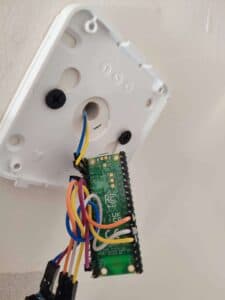
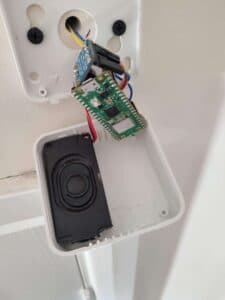
I started to layout of the hardware ready for prototyping. I found I was very lucky with the enclosure, all my components fit perfectly, but it was a very tight fit!
I also found using just one speaker from the pair worked fine and they were plenty loud enough.
Wiring Diagrams
RPI Pico
| GPIO Pin | Destination/Note |
|---|---|
| 39 -- VSYS | 5V from power supply -- Ignore this if powering your Pico via the Micro USB port |
| 38 -- GND | 0V (Ground) from power supply -- Ignore this if powering your Pico via the Micro USB port |
| 36 -- V3V Out | Connect this to the 'VIN' pin on the 'Adafruit MAX98357A' |
| 18 -- GND | Connect this to the 'GND' pin on the 'Adafruit MAX98357A' |
| 12 -- GP9 | Connect this to the 'DIN' pin on the 'Adafruit MAX98357A' |
| 14 -- GP10 | Connect this to the 'BCLK' pin on the 'Adafruit MAX98357A' |
| 15 -- GP11 | Connect this to the 'LRC' pin on the 'Adafruit MAX98357A' |
You may find this diagram helpful: https://datasheets.raspberrypi.com/pico/Pico-R3-A4-Pinout.pdf
Adafruit I2S MAX98357A
| Pin | Destination/Note |
|---|---|
| + | Connect to your speaker's Positive wire (Red) |
| -- | Connect to your speaker's Negative wire (Black) |
| VIN | Connect this to Pico's '36 -- V3V Out' pin |
| GND | Connect this to Pico's '18 -- GND' pin |
| DIN | Connect this to Pico's '12 -- GP9' pin |
| BCLK | Connect this to Pico's '14 -- GP10' pin |
| LRC | Connect this to Pico's '15 -- GP11' pin |
After you connecting these component's together I tested the code running on the Pico, I pressed the doorbell's button and everything was working well.
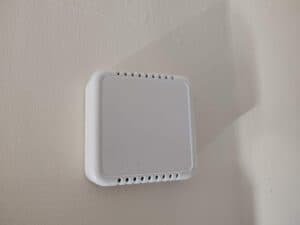
I left it a few days, pressing the doorbell button every few hours to make sure it was stable, sure enough it was! I packaged everything into the case and attached to the wall in my hallway.
Final project code
All of the code created in this project is stored on Github here: https://github.com/ryanfitton/rpi-pico-hikvision-isapi-doorbell-chime
To install on the Pico, ensure you have Micropython installed on the device and then copy all files from src to the Root of the Pico.
Images
