The Neos Smart cam is a small indoor security camera based on the Xiaomi Xiaofang hardware, this is similar to the Wyze Cam 2 which is also based on the same Xiaomi hardware.
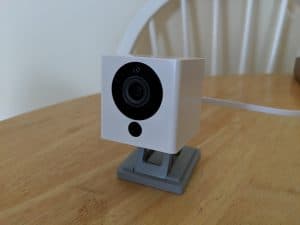
I've wanted one of these for a while, and now the Neos smart cam is readily available on Amazon in the UK, I thought now would be a good opportunity to try one out. Currently they're retailing for £24.99 and can be delivered through Amazon Prime.
By default, Neos offer 14 days of cloud storage for free (no monthly subscription) which is pretty great considering the price. But I already have a CCTV solution at home running open-source Shinobi DVR software and needed something that could provide an RTSP stream.
This is where the Xiaomi DaFang Hacks software comes in. Available on GitHub here, the code for the Neos camera only available through this commit for the moment; until it is merged into the master branch: https://github.com/EliasKotlyar/Xiaomi-Dafang-Hacks/pull/964.
DaFang hacks is custom firmware which you can flash to the camera via a MicroSD card. This give you benefits such as; no relying on the manufacturer's cloud services, SSH and FTP services on the camera itself, and the best: RTSP stream support -- this will allow you to integrate the camera into any DVR recording software, such as Shinobi, ZoneMinder or Synology's Surveillance Station.
How to install
- Firstly, download the custom firmware .bin file, this is the same firmware for the Wyzecam: https://github.com/EliasKotlyar/Xiaomi-Dafang-Hacks/raw/master/hacks/cfw/wyzecam_v2/cfw-1.1.bin or via the repo page here: https://github.com/EliasKotlyar/Xiaomi-Dafang-Hacks/
- Now have your MicroSD card ready. I used this Toshiba 16GB card, and setup a single 512mb partition using gParted. This is how I formatted the card using gParted:
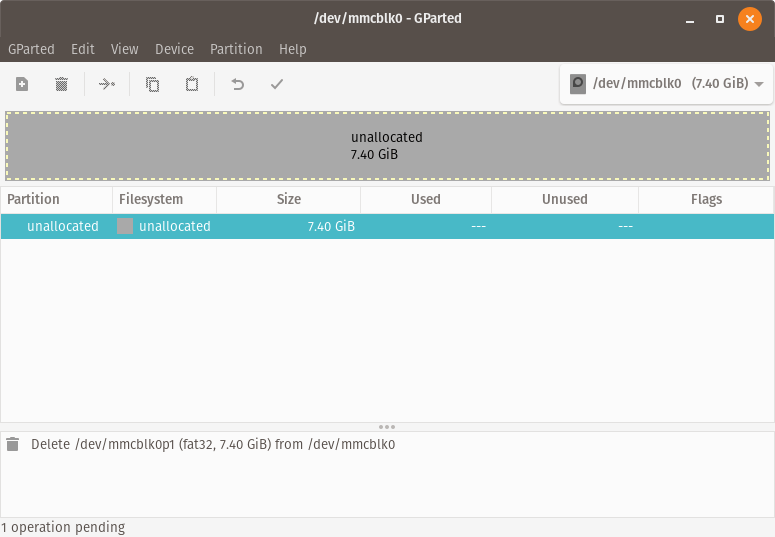
- Insert the MicroSD card into your computer and load up gParted. Select your card/drive from the dropdown at the top right, and delete all partitions so it is only showing 'unallocated':\
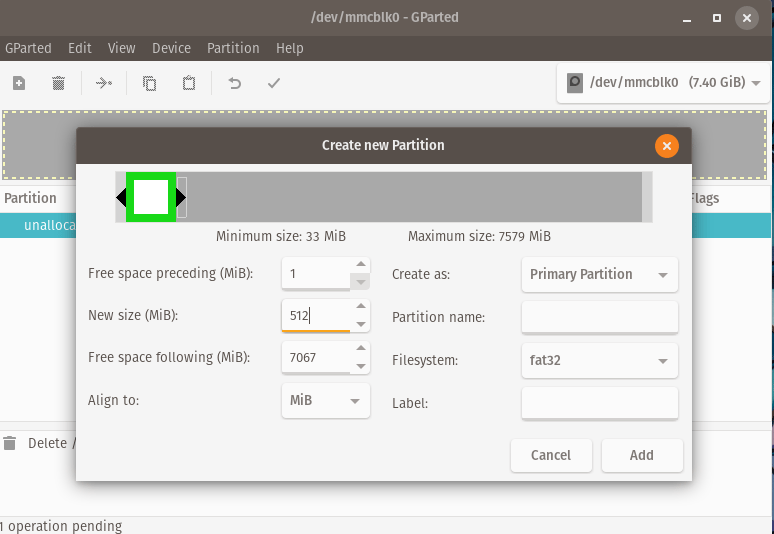
- Now create a FAT32 512mb partition:\
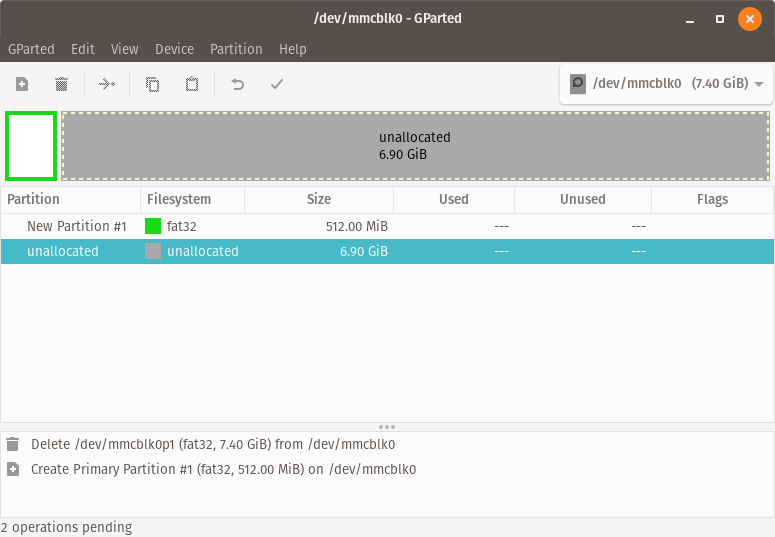
- Click add, then you should see the new partition ready to be created:\
- Click the 'tick' icon to apply the operations. You should see a success message:\
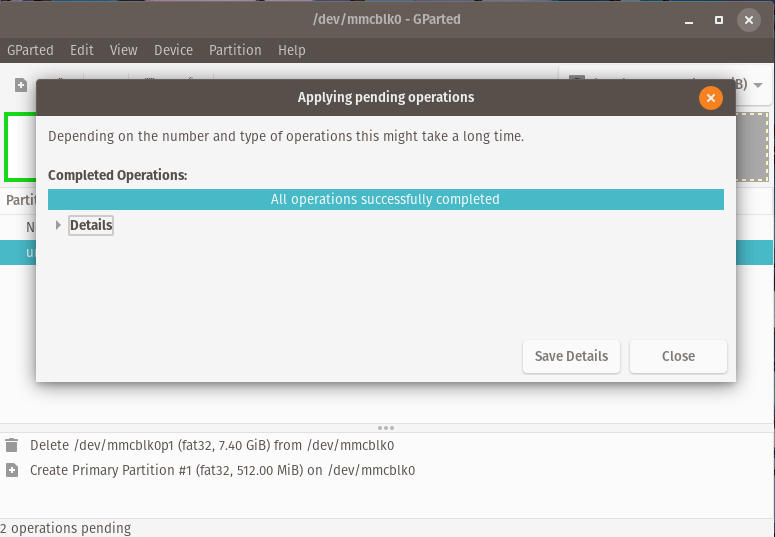
- Insert the MicroSD card into your computer and load up gParted. Select your card/drive from the dropdown at the top right, and delete all partitions so it is only showing 'unallocated':\
- Once your partition has been created, copy the 'cfw-1.1.bin' file to the drive. You must then rename this file to: 'demo.bin'. It is important that you ensure this is the only file on your MicroSD card.
- Now insert the MicroSD card into the base of your Neos Smartcam, ensure no USB cable is connected.
- Connect the USB cable and ensure you're holding down the setup button. Whilst holding the setup button, the LED indicator on the Smart cam should light-up blue, once you see this carry on holding the setup button down for 20 seconds, then let go. The instructions on Dafang's Github page state this may take up to 3 minutes, but for me this was much less. I knew this process was finished when the LED started to flash yellow rapidly. Looking up this response, means 'Ready to setup', source. This process alters the bootloader on the Smart cam so it can boot custom firmware. If you're having issues, check this video -- it helped me a lot with this process: https://www.youtube.com/embed/F-MnpGf6Iss.
- Now re-insert your MicroSD card into your computer and empty all files on this MicroSD card. Then download the 'Xiaomi-Dafang-Hacks' repository, here: https://github.com/EliasKotlyar/Xiaomi-Dafang-Hacks. Click the green button named 'Clone or download', then select 'Download ZIP'.\
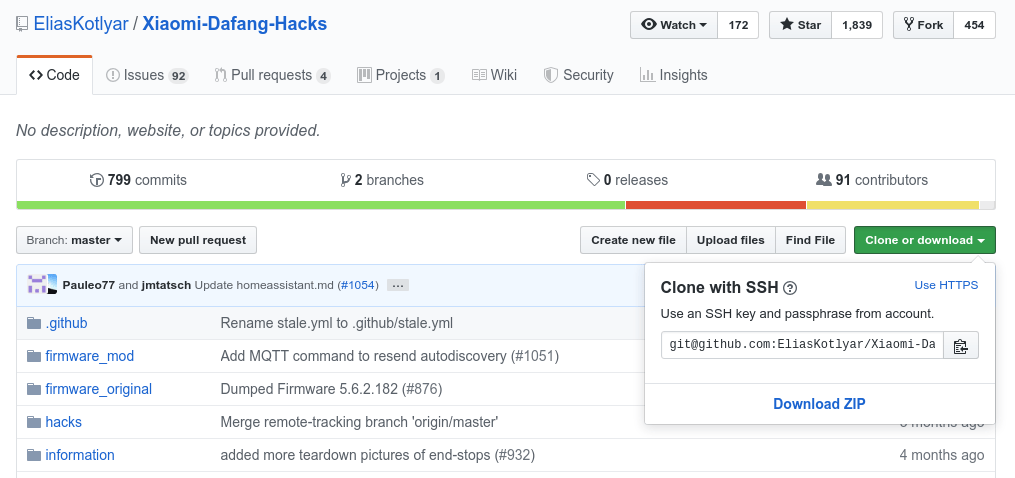
- Once the .zip file has downloaded, extract this and copy the entire contents of 'firmware_mod' to your MicroSD card.
- You will want to add your Wireless Network settings. On the MicroSD card, find the folder named 'config'. Enter this directory and find the file named 'wpa_supplicant.conf.dist', rename this file to 'wpa_supplicant.conf'.
- Now edit the 'wpa_supplicant.conf' file in a code editor. Change the values for 'ssid' and 'psk' with your own wireless network name and password, e.g:\
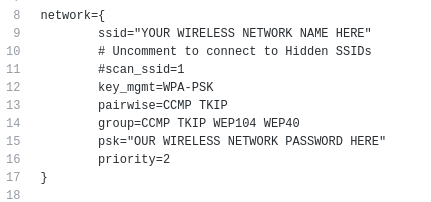
- Now save the file, and insert the MicroSD card back into your Neos Smartcam and power-on.
- If all goes well, you should be able to access the web interface in a web browser at: https://dafang with the default login details; username: root and password: ismart12
- The default RTSP stream URL is:
rtsp://ip-address:8554/unicast(replace the IP address with the one associated with your smart cam).
Updates
Update: 11/08/2019: I use Shinobi to record the RTSP stream, but have been having some issues with the stream recordings only being around 30 to 45 seconds long, they should have been 5 minutes.
I have managed to fix this by altering the settings within the Dafang web interface to:
- Disable audio recording
- Disable motion detection
- After disabling these two options, I saw the CPU usage drop from 80% to around 20%.
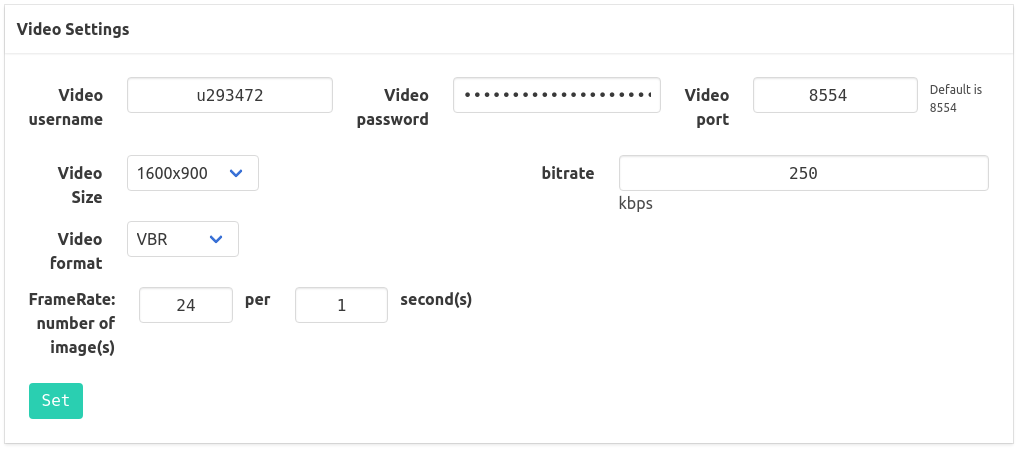
I also set these options for the video feed:
- Video size: 1600×900
- Bitrate: 500kbps
- Video format: VBR
- Frame rate: 24 every 1 second\
Finally, I setup the SWAP with a swapfile size of 512MB within the 'run.sh' file.

Update: 14/06/2020: I am no longer using this camera due to constant instability issues with Dafang dropping the RTSP with Shinobi. Where this may be fixed in the future, I am now using a Foscam C1 (Newer Model)
Help me out
If you're interested in the Neos smartcam with the Dafang custom firmware, help me out by purchasing one from Amazon UK with my affiliate code:
Links: Neos Smart cam on Amazon UK and Toshiba 16GB Micro SD card on Amazon UK