🚨 Note: This is an update to the original blog post posted here.
This blog post talks about integrating Pushover functionality to the RPI Pico doorbell chime. 📲🔔
I've had this on my to-do list for a while: "Integrate Pushover functionality." 📝
Firmware update Hikvision DS-KV6113-WPE1(B) 🔄
The first step I had to do was upgrade the firmware on my Hikvision DS-KV6113-WPE1(B) doorbell to V2.2.53_230918. This version for (B) models of doorbell can be downloaded here. ⬇️
This update is required to gain access to the ISAPI endpoint /ISAPI/Streaming/channels/101/picture which allows for an image capture. In this project, this sends an image capture of the doorbell via a Base64 encoded attachment to Pushover. 📸
Prior to this version, I was using firmware V2.2.53_220816 which did not have this endpoint available.
Testing the capture endpoint 🧪
This new endpoint can be tested via curl, try this command:
curl -i --digest -u admin:YOUR_PASSWORD "http://YOUR_IP/ISAPI/Streaming/channels/101/picture" >> example.txt
You should see a response in example.txt. ✅
Enabling Pushover ⚙️
In the updated project code on Github: https://github.com/ryanfitton/rpi-pico-hikvision-isapi-doorbell-chime
Configure your details in src/main.py. The new configuration details for Pushover you should edit are:
# Pushover Message API Configuration
use_pushover=False # Enable/Disable Pushover functionality
pushover_token="" # The Pushover APP token - Register on https://pushover.net/ to generate a token
pushover_user="" # The Pushover APP user or group key - Configure this on https://pushover.net/
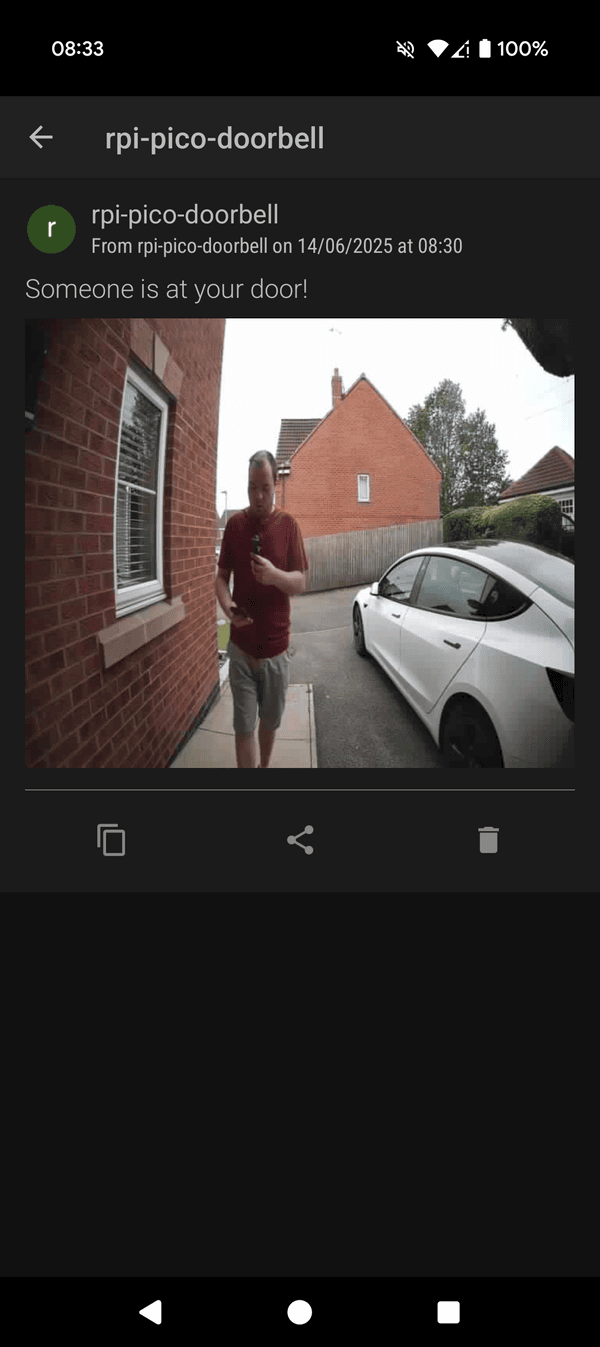
pushover_message="Someone is at your door!" # Message for the doorbell message
use_pushover: Allows you to enable or disable Pushover. Set this toTrue✅pushover_token: This is your APP token, created at https://pushover.net/apps/build. 🔑pushover_user: This is your User Key token, displayed at the top right of https://pushover.net/. Alternatively, you can use a 'User Group' token, which you can set up here. 👥pushover_message: Edit this message if you wish. This is the message that is displayed in the Pushover notification sent to your device. 📨
Capturing and sending the image 🖼️➡️📲
imageCaputure() 🏷️
Take a look at the imageCaputure() function between lines #520 and #634. Link to code.
The usual digest authentication takes place, then the request to the /ISAPI/Streaming/channels/101/picture happens on line #602.
The return of the body response is captured by the data variable on line #629, where it is encoded to Base64 and UTF-8 decoded:
# Return the base64 encoded image
data = base64.b64encode(_body.content).decode('utf-8')
The imageCaputure() function returns the data variable for use later when being sent via Pushover.
sendPushoverMessage() 🚀
This function handles sending the messages to Pushover. You can view this between lines #639 and #686. Link to code.
The Base64 encoded data returned from imageCaputure() is decoded into bytes (between lines #649 and #649):
# Decode base64 to bytes
if attachment_base64:
    image_bytes = ubinascii.a2b_base64(attachment_base64)
else:
    image_bytes = b''
It is used to build up a multipart form body. This content is then sent to Pushover (between lines #657 and #678):
# Build multipart body
body = (
    f'--{boundary}\r\n'
    f'Content-Disposition: form-data; name="token"\r\n\r\n{pushover_token}\r\n'
    f'--{boundary}\r\n'
    f'Content-Disposition: form-data; name="user"\r\n\r\n{pushover_user}\r\n'
    f'--{boundary}\r\n'
    f'Content-Disposition: form-data; name="message"\r\n\r\n{message}\r\n'
).encode('utf-8')

if image_bytes:
    body += (
        f'--{boundary}\r\n'
        f'Content-Disposition: form-data; name="attachment"; filename="image.jpg"\r\n'
        f'Content-Type: {attachment_type}\r\n\r\n'
    ).encode('utf-8') + image_bytes + f'\r\n'.encode('utf-8')

body += f'--{boundary}--\r\n'.encode('utf-8')

# Send the request
import urequests as requests
response = requests.post(url, headers=headers, data=body)
You can download the code from this project on Github: https://github.com/ryanfitton/rpi-pico-hikvision-isapi-doorbell-chime/
Feel free to make any pull requests or forks.
Watch the video below:
An example of this notification appears like this: 👇